

Views: 0 Author: Site Editor Publish Time: 2026-09-14 Origin: Site


The shift from permanent, labor-intensive masonry builds to high-performance, modular pod systems fundamentally changes backyard design. Poor spatial planning and utility mismanagement often lead to workflow bottlenecks, safety hazards, and premature material degradation in outdoor cooking spaces. When you build with traditional materials, you lock yourself into a rigid footprint that is difficult to modify and highly susceptible to weather damage over time. A structured framework for evaluating site requirements, routing utilities, and integrating a modular pod creates a scalable, weather-resistant BBQ area. We will walk you through the precise steps required to map your space, manage utility lines, and assemble a high-functioning culinary zone. This approach ensures your equipment operates safely while maximizing the usable footprint of your patio, allowing you to build a professional-grade cooking environment without the structural liabilities of traditional construction.
Material Durability: Aluminum structures eliminate the rot, rust, and warping risks associated with wood and steel, providing a stable foundation for heavy appliances.
Utility Sequencing: Gas, electrical, and plumbing lines must be mapped and trenched prior to hardscaping and pod installation to avoid costly retrofitting.
Zoning Efficiency: Effective layouts separate the cooking zone (grills/smokers) from the cooling/prep zone, ensuring safe traffic flow and optimal appliance performance.
Clearance Compliance: Modular pods require strict adherence to manufacturer and local code clearances regarding combustible materials and ventilation.
Traditional outdoor setups fail primarily because of freeze-thaw cycles and moisture retention. Water inevitably penetrates porous masonry, brick, or stucco surfaces. When temperatures drop below freezing, this trapped water expands by roughly nine percent. The resulting pressure blows out mortar joints, cracks expensive stone facades, and shifts the entire structure out of level. Wood framing presents an entirely different set of challenges. Treated lumber retains moisture, attracts termites, and poses a severe fire risk when placed near high-heat appliances. Galvanized steel frames, often marketed as a durable alternative, eventually rust. The moment a self-tapping screw pierces the protective zinc coating during installation, moisture attacks the raw steel underneath, leading to rust streaks bleeding onto your patio.
Marine-grade aluminum solves these structural failures completely. It possesses an exceptionally high strength-to-weight ratio. This makes it ideal for supporting heavy ceramic kamado grills, thick granite countertops, and fully loaded refrigerators without sagging. Aluminum forms a natural oxide layer the moment it is exposed to air. This microscopic layer prevents rust and corrosion entirely, even in harsh coastal environments exposed to saltwater spray. Because the material is non-combustible, an Aluminum Outdoor Kitchen allows for tighter clearances around gas and charcoal appliances. You do not need to build thick, heat-absorbing masonry barriers to meet fire codes.
Modular systems offer unmatched scalability for homeowners who want to build their space in phases. You can start with a basic grill and prep counter setup this season. Next year, you can add a sink module, a trash pull-out, or a dedicated pizza oven stand. You simply bolt the new aluminum frames to the existing structure. This phased expansion requires zero demolition. You avoid the dust, noise, and massive expense of tearing out old masonry just to add a few feet of counter space.
Material Comparison for Outdoor Kitchen Construction | ||||
Frame Material | Weight Profile | Weather Resistance | Combustibility | Maintenance Level |
|---|---|---|---|---|
Marine-Grade Aluminum | Lightweight (Deck Safe) | Excellent (No Rust/Rot) | Non-Combustible | Zero Maintenance |
Concrete/Masonry | Extremely Heavy | Poor (Freeze-Thaw Cracking) | Non-Combustible | High (Sealing/Tuckpointing) |
Treated Wood | Medium | Poor (Rot/Warping/Pests) | Highly Combustible | High (Painting/Sealing) |
Galvanized Steel | Heavy | Moderate (Rusts at cut points) | Non-Combustible | Medium (Rust mitigation) |
Accurate spatial planning dictates the success of your outdoor cooking zone. You must measure your available footprint carefully using a tape measure and marking paint. A functional layout requires accounting for operational clearances, utility runs, and environmental factors before you order a single cabinet.
You need a minimum operational clearance radius of 36 to 42 inches around the primary cooking zone. This space allows the cook to move safely while carrying hot grates, heavy trays of meat, or sharp knives. If your patio serves multiple cooks simultaneously, expand this clearance to 48 inches to prevent collisions. Overhead clearance is equally critical. Combustible ceilings, wooden pergolas, or fabric awnings require strict vertical clearances. You generally need a minimum of 36 to 48 inches between the grill surface and any overhead structure, depending on the grill's BTU output.
Integrating a powerful outdoor ventilation hood changes these requirements. Hoods must extend past the cooking surface by at least three inches on all sides to capture smoke effectively. For compact spaces, optimize the footprint by focusing on vertical storage and multi-functional appliances. Calculate the minimum viable footprint by prioritizing combustible clearances first. You can sacrifice some prep counter space, but you cannot ignore fire safety codes. A tight condo backyard can still house a highly efficient setup if you measure precisely and utilize narrow modular cabinets.
Evaluate the distance from your home's main utility lines to the proposed site. Long utility runs increase project costs significantly. Trenching through existing hardscape, concrete, or mature landscaping for gas, water, and electrical lines requires heavy equipment and specialized labor. Locate your outdoor kitchen as close to the indoor electrical panel and gas meter as practical. This minimizes voltage drops on long electrical runs and maintains proper gas pressure for high-BTU burners. A gas line that is too long or too narrow will starve your grill of fuel, resulting in low flames and poor cooking performance.
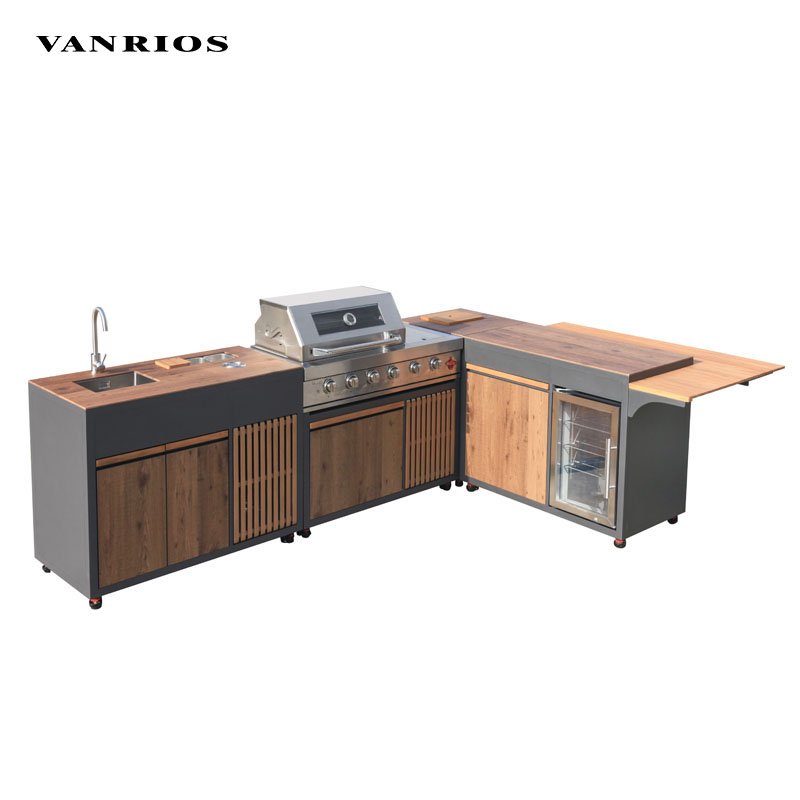
Direct UV exposure fades control panels, degrades rubber gaskets, and heats up dark surfaces over time. Precipitation introduces water into burner valves, ash catchers, and electrical outlets. Assess how the elements will hit your proposed site throughout the day. Adding a shade structure like a pavilion or a louvered pergola protects your investment and extends your cooking season. Evaluate the structural requirements for these additions early in the planning phase. You may need to pour deeper concrete footings to support a heavy timber pavilion over the cooking zone, which must be done before the patio surface is finished.
Modular pods require a solid, perfectly level foundation. Concrete pads or reinforced decking must meet specific load-bearing requirements. A fully loaded setup with a 42-inch grill, a refrigerator, and thick stone counters can weigh well over a thousand pounds. If you are building on a wooden deck, you must consult a structural engineer to ensure the joists can handle the concentrated dead load.
A perfectly level surface ensures proper water drainage across the patio, but patios are intentionally sloped (usually 1/4 inch per foot) to shed water away from the house. This slope means your cabinets will not sit level naturally. You must use the adjustable leveling legs on the bottom of the aluminum modules to compensate for this slope. If the frames are not leveled perfectly, the aluminum will twist. This twisting prevents doors from closing flush, misaligns drawers, and creates uneven stress points that will eventually crack stone countertops.
Mark the exact footprint of the modular pod on the patio using chalk lines.
Identify the highest point of the patio slope within that footprint.
Set the first cabinet at the highest point and adjust its legs to establish the baseline height.
Connect subsequent cabinets, adjusting their legs downward to match the baseline height of the first unit.
Verify the entire assembly is level front-to-back and side-to-side using a 4-foot spirit level.
Effective layouts rely on the outdoor work triangle. You must map the functional relationship between the prep station, the primary heat source, and the serving area to prevent bottlenecks during a busy cookout.
Minimize cross-traffic between your guests and the active cooking zone. The cook needs a clear, unobstructed path from the refrigerator to the prep counter, and then directly to the grill. Guests should not have to walk past a hot smoker or an open flame to grab a cold drink. Position the cooling zone on the outer edge of the modular BBQ kitchen island. This allows guests to access beverages and ice without entering the chef's primary workspace.
Address specific appliance workflows carefully based on what you cook. Isolate grease management zones. Flat-top griddles produce significant grease splatter and airborne oil. Keep them away from porous materials, fabric patio furniture, or primary seating areas. Pellet smokers generate ash and heavy smoke during startup. Position them downwind from the main dining table based on your yard's prevailing wind patterns to keep guests comfortable.
Secondary units streamline entertaining for large gatherings. You can use a prefab backyard catering unit for beverage service, bartending, or buffet-style staging. Place this unit closer to the dining area or pool deck. This physical separation keeps the main cooking pod dedicated strictly to raw food preparation and high-heat grilling. Determine the optimal distance to manage smoke drift and noise. A distance of six to twelve feet between the active grill and the catering station usually works best, providing enough separation for safety while keeping the host engaged with the party.
You must map and install all utilities before assembling the modular frames. Retrofitting gas pipes or electrical conduit after the cabinets and heavy stone counters are bolted in place is incredibly difficult and expensive.
Outdoor environments demand strict electrical safety protocols. You need dedicated 20-amp GFCI (Ground Fault Circuit Interrupter) circuits wired with outdoor-rated UF-B cable or THWN wire inside PVC conduit. An outdoor kitchen with fridge requires continuous, stable power to keep food at safe temperatures. Do not put the refrigerator on the same circuit as a high-draw appliance like an electric patio heater or a blender, which could trip the breaker and spoil your food. Rotisserie motors, pellet smoker augers, and under-counter task lighting also need accessible, weather-protected outlets positioned inside the cabinets.
Plumbing requires careful planning for freezing temperatures. Install accessible winterization shut-off valves inside the heated envelope of your home (like a basement or crawlspace). This allows you to shut off the supply and drain the outdoor lines completely before the first hard freeze. Decide on your drainage solution early. A simple dry well handles basic sink runoff from washing vegetables or rinsing hands. However, if you plan to wash greasy dishes or handle raw meat, local health and building codes usually require a direct tie-in to your home's sanitary sewer system. Access to hot water requires either a dedicated insulated line from the house or a small, under-sink point-of-use electric water heater.
You must choose between a natural gas hardline and propane tank integration. Natural gas provides an endless fuel supply and eliminates the chore of swapping heavy tanks. It requires professional trenching and hard-piping (usually black iron pipe or CSST) from your home's meter. You must ensure your existing meter can handle the additional BTU load. A large outdoor grill and a double side burner can easily pull 120,000 BTUs combined. If your gas line is undersized, the pressure will drop, and the grill will not reach searing temperatures. Propane offers flexibility. You can house a standard 20-pound tank directly inside a specialized modular cabinet equipped with a pull-out tray for easy swapping.
Ventilation is mandatory for enclosed gas appliances. Gas leaks inside a sealed cabinet create severe explosion risks. Propane is heavier than air. If a leak occurs, the gas pools at the bottom of the cabinet. You must install ventilation panels at the lowest point of the enclosure to let it escape. Natural gas is lighter than air. It rises. You must install ventilation panels at the highest point of the enclosure, just below the countertop, to prevent gas from accumulating.
Appliance selection dictates the exact configuration of your modular pod. You must choose your equipment, note the specific model numbers, and pull the manufacturer's cut-out dimensions before ordering the cabinets to ensure a perfect fit.
Match your appliance dimensions with the cabinet manufacturer's specifications. A 36-inch drop-in grill requires a specific cabinet width and internal support structure to bear the weight safely. High-heat appliances like ceramic kamados or heavy-gauge charcoal grills present unique thermal dynamics. They radiate intense heat downward and outward. Integrating these into metal cabinetry requires specialized heat shields or insulated grill jackets. These double-walled stainless steel jackets create a safe air gap between the hot grill chassis and the aluminum frame, preventing the metal from warping or transferring heat to adjacent storage areas.
Outdoor storage must protect your gear from moisture, dust, pollen, and pests. Evaluate the necessity of weather-sealed, gasketed cabinetry. High-quality aluminum outdoor kitchen solutions feature heavy-duty rubber weatherstripping around every door and drawer perimeter. They also utilize integrated drip edges that channel rainwater away from the cabinet openings. This keeps dry goods, paper towels, and expensive BBQ tools perfectly dry during heavy rainstorms.
Analyze the structural integrity of the shelving and drawer slides. Cast-iron skillets, Dutch ovens, and 40-pound bags of hardwood pellets are incredibly heavy. Flimsy wire racks will bend and fail. Solid aluminum shelving with reinforced cross-bracing supports this weight without sagging. Drawers should utilize heavy-duty, stainless steel ball-bearing slides rated for at least 100 pounds.
Plan for ergonomic tool and fuel storage. Designate specific deep-drawer configurations for oversized BBQ tools. Spatulas, long tongs, and thick grill gloves need deep, wide spaces to prevent the drawer from jamming. Create secure, dry compartments specifically for firelighters, matches, and wood pellets. Wood pellets absorb ambient humidity rapidly. When they absorb moisture, they expand and turn into sawdust, ruining them for smoking and potentially jamming your smoker's auger. A sealed aluminum drawer prevents this degradation entirely.
Even the best modular systems fail if installed incorrectly. Understanding common implementation risks and following a strict assembly sequence ensures a smooth, professional-grade installation.
Risk: Inadequate Ventilation. Gas pooling leads to dangerous flare-ups or catastrophic explosions when the grill is ignited.
Mitigation: Ensure the modular pod design includes specific cross-ventilation panels. Place them at the lowest point for propane and the highest point for natural gas. Never block these vents with stored items, trash cans, or bags of charcoal.
Risk: Utility Mismatch. Your home's infrastructure may not support the new outdoor load, leading to tripped breakers or low gas pressure.
Mitigation: Conduct a pre-installation utility audit. Verify that your existing electrical panel has physical space and amperage capacity for new breakers. Confirm your gas meter can handle the total combined BTU output of all indoor and outdoor appliances running simultaneously.
Risk: Heat Transfer to Combustibles. Grills placed too close to siding, fences, or wooden railings cause structural fires.
Mitigation: Utilize insulated grill jackets where required by the manufacturer. Maintain strict adherence to minimum distance-to-combustible codes for adjacent fences, vinyl siding, or wooden decking. Use non-combustible backsplashes if the grill backs up to a wall.
Risk: Misaligned Modular Assembly. Uneven frames cause countertop cracking, door binding, and poor water drainage.
Mitigation: Follow a strict step-by-step assembly sequence. Use a long spirit level to perfectly level the base aluminum frames. Adjust the leveling legs before bolting the modules together. Never drop heavy stone countertops onto an unlevel frame. This prevents structural warping and uneven stress points that will snap granite or quartz.
Initiate a comprehensive site survey using a laser level and marking paint to measure your available footprint and map the work triangle.
Consult a licensed contractor to audit your electrical panel capacity and plan the utility trenching routes before ordering equipment.
Finalize your exact appliance list, including specific model numbers and cut-out dimensions, to dictate the precise modular pod configuration.
Establish a clear timeline for pouring the concrete foundation or reinforcing the wooden deck before the aluminum cabinets arrive on site.
A: Aluminum conducts heat, but powder-coated finishes significantly reduce surface heat absorption. Lighter powder-coat colors reflect UV rays, keeping the cabinets comfortable to touch. Raw, uncoated dark metals absorb much more heat. The modular design also allows air to circulate behind the panels, helping dissipate any accumulated surface temperature quickly.
A: The modular cabinet unit itself rarely requires a permit because it is not a permanent structural addition to the home. However, extending electrical circuits, running new plumbing lines, or trenching for natural gas almost universally requires local municipal permits and professional inspections to ensure code compliance.
A: Yes, but you must verify the deck's load-bearing capacity first. Heavy appliances and stone counters add significant weight. You must also use non-combustible grill mats under the unit. If the unit houses a grill, you must install an insulated heat jacket to prevent heat transfer to the combustible wooden decking.
A: Shut off the dedicated water supply valve inside your house and drain the outdoor lines completely. Power down the refrigerator, empty all contents, clean the interior, and leave the door slightly propped open to prevent mold. Finally, cover all appliances and the modular pod with breathable, waterproof covers.
A: The industry standard for prep and cooking surfaces is 36 inches from the ground. If you include a raised bar seating area, that section typically sits at 42 inches. Adjustable leveling feet on the bottom of the aluminum modules are critical to achieving this exact height on sloped patio surfaces.


